
ES: Reporte de Información confidencial en SQL Server First it is important you have all…
How to mask data in Azure SQL Database
ES: Cómo enmascarar datos en Azure SQL Database
After you have seen the whole process of Finding sensitive data in SQL Server with the help of SQL Server Management Studio and also the process of Masking Data in SQL Server, now is the turn of the cloud. This time you’ll see how to mask data in Azure SQL Database.
Just for the demo
If you want to try this, first you need to have an Azure SQL Database created. You can create a test database (Sample) or use any database to create this table.
CREATE TABLE UserInfo
(id int identity(1,1),
FirstName varchar(15),
LastName varchar(15),
CreditCard varchar (25),
Email varchar(25),
DocNumber bigint
)

INSERT INTO UserInfo
(FirstName, LastName, CreditCard, Email, DocNumber)
VALUES
('Pablo', 'Fernandez', '4940-9898-8989-1234','pablof@datoptim.com',123581321)
We’re ready to mask data in Azure SQL Database
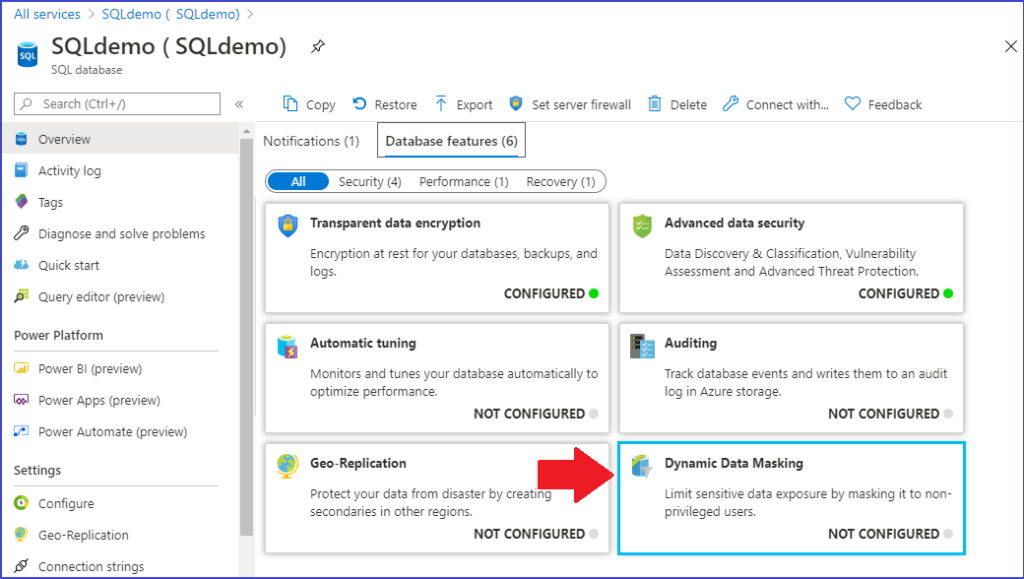
Pick your database you want to work with. In the left menu be sure you are in the «Overview» tab and you can see at the bottom the database features available. You are looking for «Dynamic Data Masking»
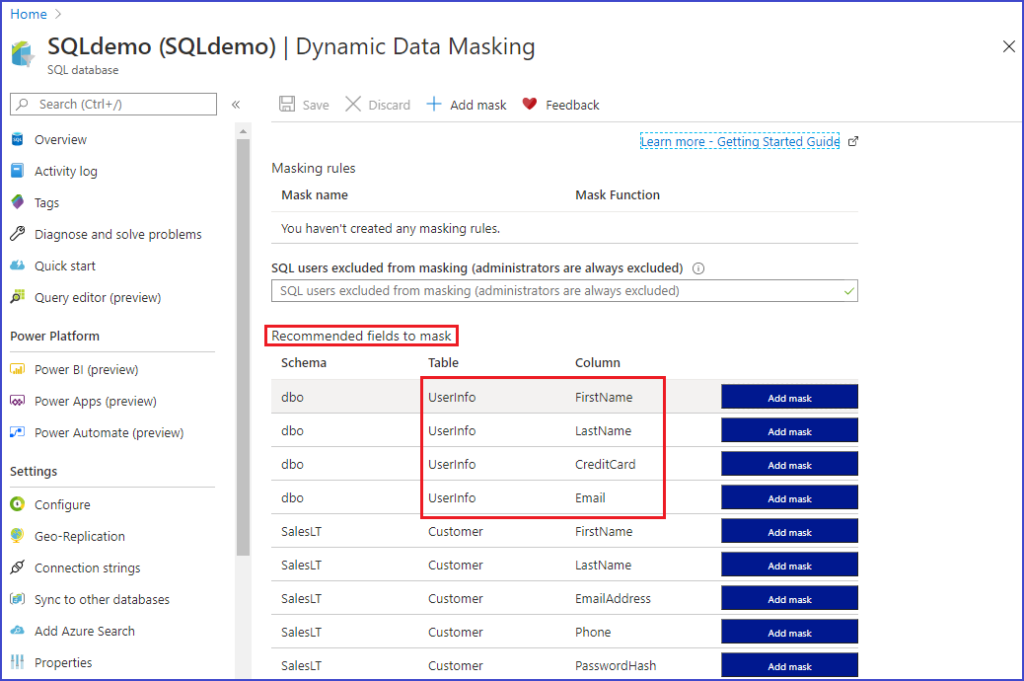
In the moment you click this option, you’ll see different columns previously listed as a suggestion to start the masking process. Let’s focus on the UserInfo table we just created.
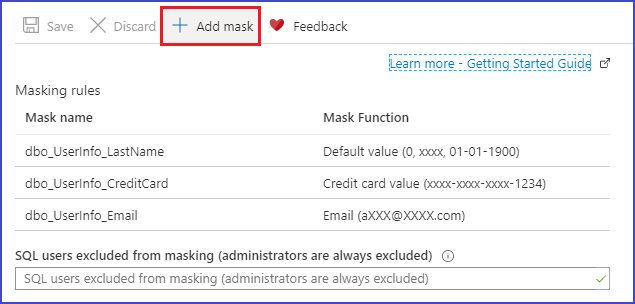
After you click the «Add mask» buttons, you can verify that all of the columns selected appear at the top of the screen.
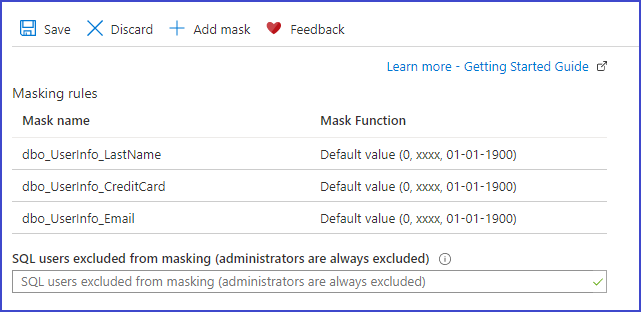
Now you just have to «Save» this work.
Now, let’s query the table
You have chosen the columns you want to mask. Now it’s time to use a non privileged user to query the table. I have created a user called ‘nonAdminUser’ and I use it to connect the database through the «Query Editor»
Now let’s do a SELECT * and watch the results.
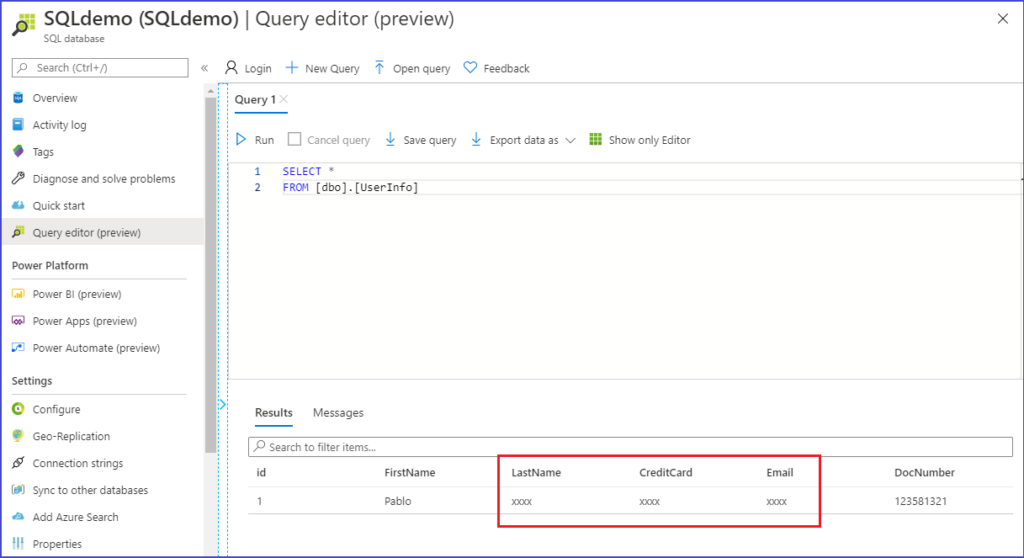
I think there’s something you don’t like, right?
You can make some more changes if you want.
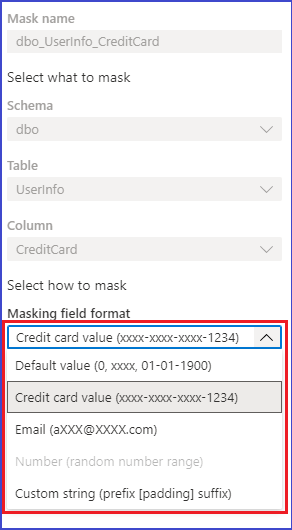
Go back to the Dynamic Data Masking screen, just where you click the buttons to select the columns you wanted to mask. If you click the CreditCard column, for example, you’ll see all the masking options in the drop down list as I can show you in the image below.
Obviously the best choice here will be the one related to credit cards.
You can do exactly the same with email field.
And can I do my own masking functions?
Of course. Did you see the «custom» option?
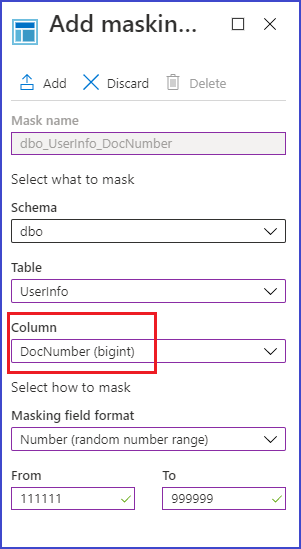
Now you will mask a column that was not in the recommended columns and you will apply a custom function.
In the Dynamics Data Masking screen you will choose the option «Add mask».
In this case we choose DocNumber column and we are going to mask with a random function between to values. You can see that it’s really intuitive to follow the instructions.
We did it. We can mask data in Azure SQL Database
Let’s query the table again.
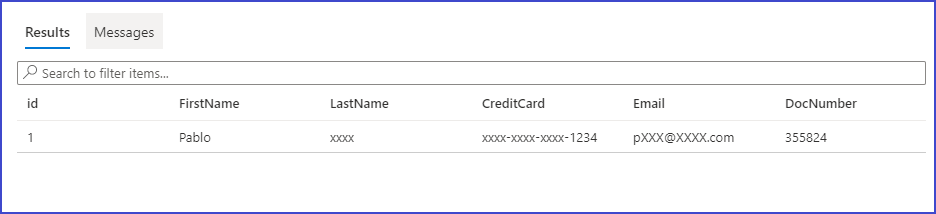
Now it looks different, right? It looks better according to our masking criteria we have defined.
As you can see, there no complication with this process.
If you want additional details for masking functions with Azure SQL Database, you can see the official documentation too.